Showing posts with label pressure cooker. Show all posts

Oct 1, 2018

In Which I Make Vegetables Taste Less Terrible than Usual


There's nothing I love more than a big plate of beautiful, fresh-cut vegetables.  Hahaha, just kidding, I hate vegetables.  I mean, honestly, it's not the vegetables' fault.  Mother Nature made them very important nutritionally, but she also generally made them taste awful.  That's just rude.  So I'm always on the lookout for ways to actually enjoy eating vegetables since I would prefer to not be a fat slob.  One of my favorite ways to do that is with stir fry.  I make a darn good stir fry, but I was looking for a quick, hands-off, less oil-consuming way to enjoy some of the same flavors.  Less splatter on my stove would be appreciated, too.  Sounds like a job for Instant Pot!


In regards to not being a fat slob, I recently started following Weight Watchers.  I did it once before about 10 years ago, and I remember always being hungry and crabby.  But I heard they had made some big changes recently, and I was pretty desperate to not feel like a gross blob anymore, so I jumped in with both feet.  So far, I am liking it a lot.  I feel like it's teaching me to be more mindful about what I eat and drink.  And given how much I love to cook, I needed a plan that let me still have some freedom to cook with all the food groups and be as creative as possible.  Telling me I have to eliminate dairy, or gluten, or whatever is guaranteed to make me cry.  (Believe me.  It's happened.)  So, hey, if you're doing Weight Watchers, this makes 6 servings which are 5 SmartPoints each, according to their points calculator.  Let the good times roll.


I call this dish "teriyaki."  Is that really what it is?  I have no idea.  I think traditional teriyaki sauce has mirin in it, and not pineapple juice.  Probably no lemongrass either.  But the flavor profile is exactly what I was going for, and the little baby cans of pineapple juice in my pantry got a chance to do something other than make cocktails.


 Pressure Cooker Teriyaki Chicken & Rice with Non-Terrible Tasting Vegetables

I used my 6 quart Instant Pot.  You'll need a steamer basket that fits inside your pot.  I have the Oxo Good Grips stainless steel steamer and it's awesome.  Cut the chicken into very thin strips and this will be plenty of time for them to cook through.  I actually started with chicken cutlets, so they were really thin.  If you want bigger pieces of chicken, you should probably brown them on saute mode first to make sure they get cooked through in time.  I like to use the ginger and lemongrass paste that comes in a tube because it's so easy and ready to go.  They will probably be in a refrigerated area of your produce section.

2 tsp. canola oil
1/2 cup onion, diced
1 tsp. minced garlic
2 tsp. ginger paste
2 tsp. lemongrass paste
2 cups chicken broth
3/4 cup soy sauce
3/4 cup pineapple juice
1 Tbs. packed brown sugar
1 1/2 cups long grain white rice
1 1/2 lb. chicken cutlets (or breasts), cut into very thin strips
1 cup baby carrots, cut into thirds (about 1/2" long pieces)
2 cups small broccoli florets
1/2 cup sugar snap peas, cut in half
1/2 cup red bell pepper strips
chopped green onions for garnish (optional)

Turn the pressure cooker to saute mode and add the oil.  Once the oil is hot, add the onion and a pinch of salt.  Cook until the onions are softened, about 5 minutes.  Add the garlic, ginger, and lemongrass and cook until fragrant, about 1 minute.  If any fond has developed on the bottom of the pot, add about 1/4 cup of the chicken broth and use a wooden spoon to scrape up the browned bits.  Then add the rest of the broth, soy sauce, pineapple juice, and brown sugar.  Add the rice and stir everything up.  Scatter the chicken strips over the rice.

Next, put your steamer basket in on top of the rice mixture.  Put all of the veggies except for the green onions in the steamer basket.  Secure the lid and cook on high pressure for 3 minutes, then do a quick pressure release.  Carefully dump the steamed vegetables from the steamer basket into the rice mixture and stir it all together.  Serve, garnishing with green onions.  I also added a small sprinkling of chow mein noodles because they look good in the picture.  They taste good on there, too, but if you're counting points like I was, you can't do very many because they add up fast.


Jul 29, 2018

Adrift in a Sea of Tomatoes


Garden season really got off to a bang here with a cucumber crop which was the stuff of legends.  Apparently cucumber plants like hot weather, because it had been hotter than the pits of Hades around here, and they were thriving.  I'm glad someone likes it.  I've made pickles and relish twice already, neither of which I eat, but there were just too many fresh cucumbers to keep up with.  Then came the squash bugs.  Those jerks have nearly killed my zucchini plant after only getting 3 zucchinis from it, and you know that's some quick devastation since a mature plant will grow 3 zucchinis in about 5 minutes.  (Or, at least it seems that way.)  Then they started going after the cucumbers.  We're fighting back as best we can, but those little bastards are pretty proficient, so our cucumber days may be winding down prematurely. 


Luckily the tomato harvest is really picking up steam.  I have MANY tomato plants this year, because a lot of little volunteer plants came up and I was too much of a softy to rip them all out.  Eating a fresh tomato plain, all by itself, does not interest me in the least.  (It's a texture thing.)  But cooking and preserving tomatoes is my jam.  Salsa, seasoned tomato sauce, roasted tomato slices, etc....the sky is the limit.  Today, tomatoes were taking over my kitchen counter.  I needed to take action, and I decided on tomato soup.


The way I've made cream of tomato soup for years (on my other blog here) is labor intensive.  It makes an amazing soup; a rich, complex, bisque-like bowl of hearty goodness.  But, as I've mentioned before, many things in my life have had to get quicker and easier as the chaos has increased with the addition of 2 young children who hate sleep.  And now I have a job, too.  I am much more enthusiastic about "chuck it in the pot and press start" recipes than I ever was before.  So that's what I really wanted to create here.  I used some proportions from my other recipe, but relied on the Instant Pot to do the work for me.  I took another 3 tomatoes or so and sliced them really thick, drizzled on olive oil, sprinkled with kosher salt and Penzey's frozen pizza seasoning, and roasted them to put on grilled cheese and peppered bacon sandwiches.  So it was like a sophisticated, grown up (but still easy) version of tomato soup and grilled cheese, which is still one of my most favorite meals, hands down. 


Much to my amazement, my almost-5 year old tried the homemade soup.  "Mommy, I do like it," she said.  "Wonderful, honey!  I'm so glad you tried it!" I answered.  "Can I have my regular tomato soup now?  The stuff in the can?" she asked.  So, yeah.  One bite.  I got her to take one bite of the good stuff.  Sigh.


Easy Pressure Cooker Tomato Soup

I used my 8 quart cooker and made a lot because I had tomatoes coming out of my ears.  I see no reason why you couldn't use a 6 quart cooker and cut the recipe in half.  As written, I fed 4 adults and had a decent amount of leftovers.

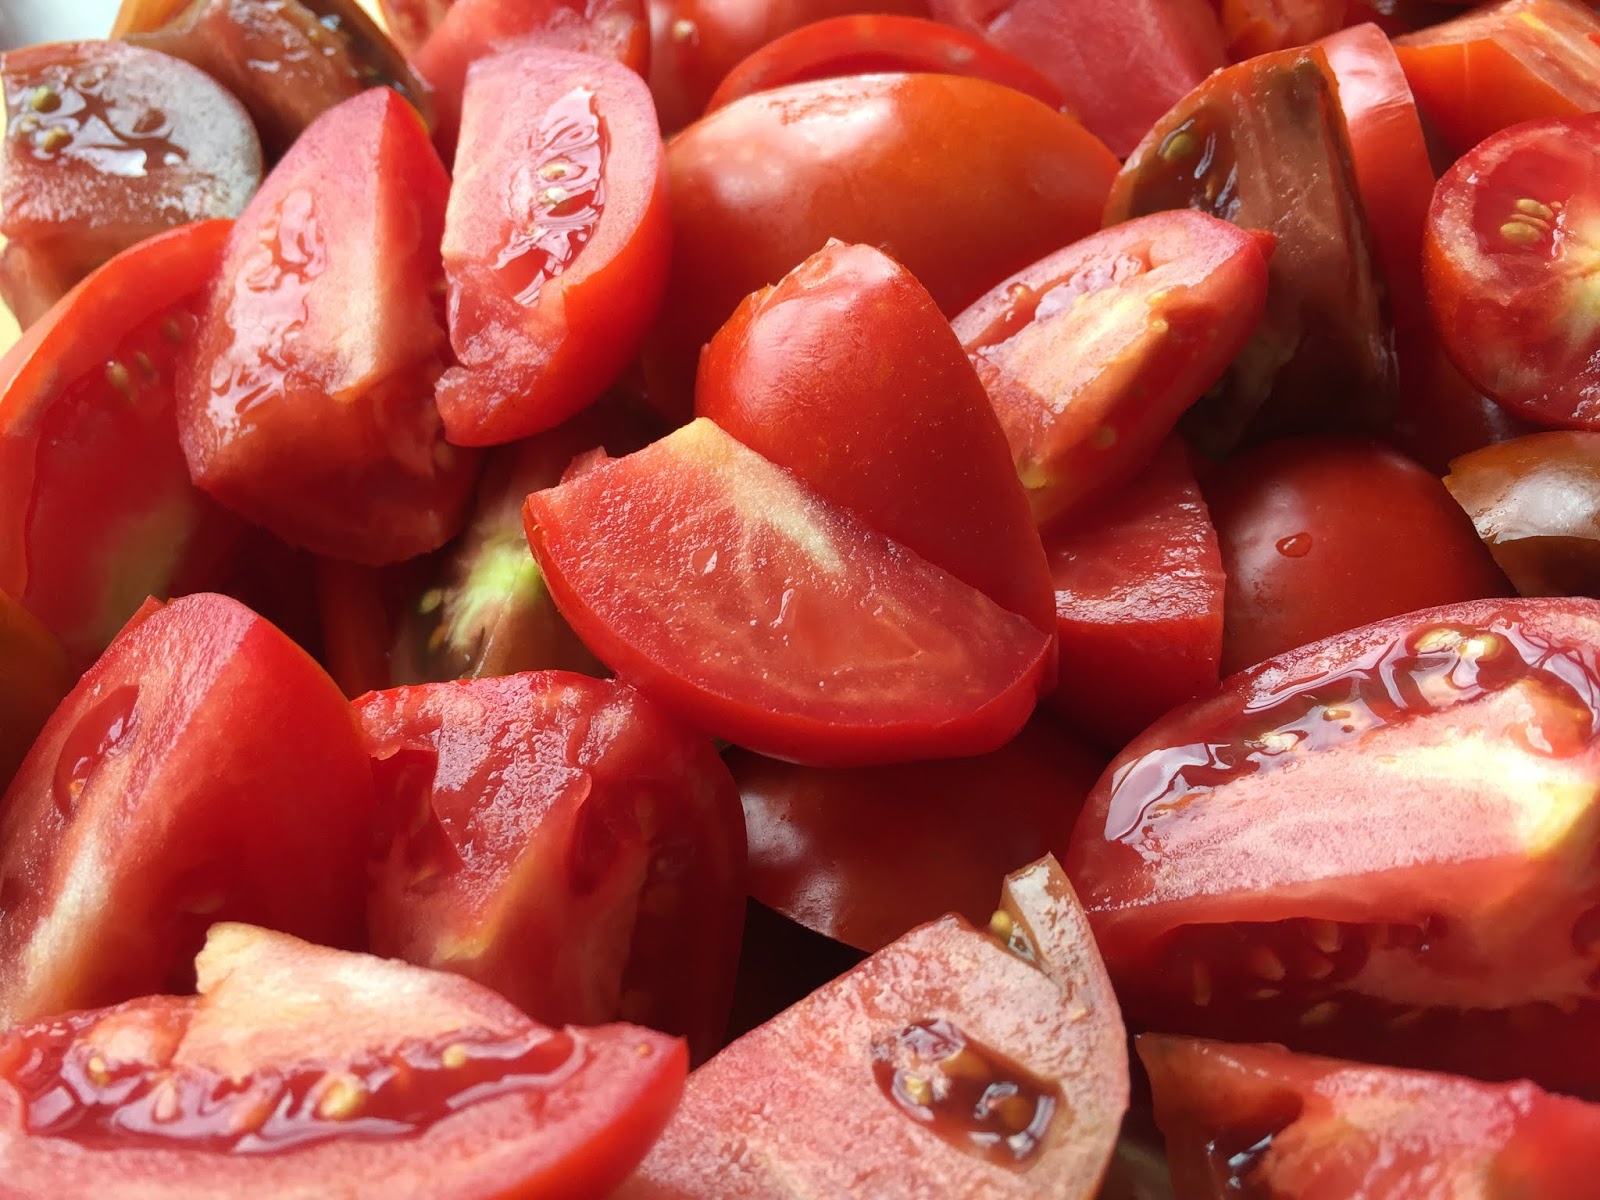
4 lbs. tomatoes, cored and quartered
1 large onion, rough chopped
1 Tbs. minced garlic
1 cup vegetable broth
1 tsp. kosher salt
1 bay leaf
1 Tbs. tomato paste
2 Tbs. brown sugar
1/2 cup heavy cream
1 to 2 Tbs. fresh chopped basil
salt and pepper to taste

Put the tomatoes, onion, garlic, veggie broth, salt, bay leaf, tomato paste, and brown sugar in the pressure cooker.  Cook on manual, high pressure, for 15 minutes and then do a quick pressure release.  Blend the soup with an immersion blender until it's pretty smooth.  You could also stop at this point, chill the mixture and blend it in a blender once it's cooled.  Then heat it back up on the stove top to finish it.  Or, if you're doing the immersion blender method, blend until smooth and see how you feel about the consistency.  You may want to turn your pot to saute and cook off a little bit of the water if it looks too watery.  This will depend on your tastes and your tomatoes.  I let mine simmer another 5 minutes or so to thicken up a bit.  Turn off the heat and stir in the cream, and chopped basil.  Season with salt and pepper to taste and serve.


Apr 5, 2018

Oh, Tacos....I Can't Quit You


I have a very bad habit when I plan meals of deciding what I want to make first, and then checking the pantry and freezer to see if I have the things to make it.  I also have a bad habit of picking up packages of meat at the grocery store that say "Price Cut Now!" because they're about to go past their sell-by date.  Then I wrap them up and freeze them to use later.  Very rarely do I go to my favorite grocery store and not come home with several packages of meat I wasn't planning to buy.  I cannot pass up a cheap brisket, y'all.  I can buy these things with impunity because I have TWO giant chest freezers to store it all in.  (One I inherited from the previous owners of my house; I didn't purchase them both.  I'm not *that* crazy.)  But the freezers are filling up, so this week I was determined to check the freezer for some kind of meat to use first, and then decide what to cook.  I made my selection, a couple packages of stew meat.  Now, what to cook....


Problem was, I was already thinking about tacos.  There are certain food items that, once I've got a hankering for them, I can't think of ANYTHING ELSE until I get them.  Stew meat isn't necessarily screaming out to be made into tacos, but the thought was already in my head.  So here's how the recipe selection conversation went in my head:

I could make the obvious beef stew.  Dad really likes that.  Doesn't sound that great to me, though.

Tacos.

Or maybe goulash.  Haven't had that in a while.

Tacos.

<Searches internet for "stew meat recipes that aren't stew.">

Gurl.  Tacos, dammit.

Beef stroganoff?  I could do that in the instant pot.

Bitch, seriously. TACOS.

I could make mom's awesome vegetable beef soup.

YOU GET YOUR BITCH ASS IN THAT KITCHEN AND MAKE SOME TACOS GOD DAMMIT.

What the heck, I'm going to try to make shredded beef tacos!

Jesus, *finally.*


Is it ridiculous to make shredded beef tacos from stew meat?  Maybe.  But here we are.  And I don't think you'll be disappointed.

Bonus Recipe alert:  The salsa verde is totally optional, but it's a pretty nice accompaniment, and it's easy.  It's good just used like a regular salsa with chips, too.  And I'm planning to use my leftover and some rotisserie chicken to make enchiladas verdes.  If you want to get tipsy with your tacos, Dogfish Head SeaQuench Ale would be a fantastic pairing.


Pressure Cooker Shredded Beef Taco Filling

I envisioned this served on soft corn tortillas.  It was good that way, but most of us ended up liking the flour tortillas better.  The new little street taco tortillas that Mission makes were great.  I think it would be good with crunchy taco shells as well.

2 tsp. oil
1/2 a large onion, diced
2 cloves garlic
1 Tbs. tomato paste
2 tsp. cumin
1 tsp. Mexican oregano
2 tsp. chili powder
1 tsp. coriander
1/2 tsp. cinnamon
1/4 tsp. cloves
1 cup beef broth
2 tsp. salt
1/2 tsp. ground black pepper
1 bay leaf
2 lbs. stew meat

Turn the pressure cooker to saute mode and add the oil.  Once the oil is hot, saute the onion until softened.  Add the garlic and cook until fragrant, about 1 minute.  Add the tomato paste, cumin, oregano, chili powder, coriander, cinnamon, and cloves and cook for a minute or two.  Pour in a little of the beef broth and scrape up the fond from the bottom of the pot.  Pour in the rest of the broth and stir in the salt, pepper, and bay leaf.  Add the stew meat.  Put the lid on the pressure cooker and set to high pressure for 45 minutes.  Allow a natural pressure release for 10 minutes and then release the remaining pressure.  Serve as you see fit.  We topped with pickled onions and jalapenos, salsa verde (recipes below), monterey jack cheese, cotija cheese, sour cream, and cilantro.


Pickled Onions and Jalapenos

1 large red onion, sliced
1 or 2 jalapenos, sliced
1 1/2 cups red wine vinegar
1/2 tsp. salt
3/4 cup sugar

Put the sliced onions and jalapenos in a bowl, or in two separate bowls if you live with wimps like me who can't handle jalapenos.  Pour the red wine vinegar, salt, and sugar in a saucepan and bring to a boil.  Simmer until the sugar is totally dissolved.  Pour the hot vinegar over the onions and jalapenos and cover with plastic wrap for at least 30 minutes.  You can make these ahead of time and chill them, or use them still warm.

Pressure Cooker Salsa Verde

1 tsp. oil
2 cloves garlic
1 tsp. cumin
1/2 large onion, rough chopped
2 poblano peppers, stem and seeds removed
1 lb. tomatillos, husks removed, washed, and cut in half
1/2 cup water or chicken broth
1 tsp. sugar
salt

Turn the pressure cooker to saute mode and add the oil.  When the oil is hot, add the garlic and cumin and cook for a minute or two.  Add the onion, peppers, tomatillos, and water or broth.  Put the lid on the pot and set to high pressure for 15 minutes.  Allow a natural pressure release for at least 10 minutes.  Blend the mixture until smooth with an immersion blender.  Stir in the sugar and salt to taste.

Jan 15, 2018

Wherein I Finally Conquer Pork in the Instant Pot


While my successes in the Instant Pot have certainly outnumbered the failures, I have definitely had a few regrettable experiences.  I've tried really hard to adapt a recipe that has rice noodles, and friends, they just do not work.  Rice noodles + pressure = mush.  Even if you set the time to zero.  Even if you do low pressure.  Even if you sacrifice a virgin into the depths of a raging volcano.  (I assume.)  You can of course cook them separately, but then it feels like, what's the point?  Someone smarter than me may still conceivably figure it out, but I, for one, am admitting defeat on that issue.  Pork has beaten me multiple times as well.  It kept turning out dry and tough.  I knew I was going to eventually come out on top with that one, but I didn't think my first victory would be so spectacular.  I invite you to please share the spoils of my triumph by trying out this marvelous pork roast recipe.


I've mentioned before that my Grandma, Marguerite, was a wonderful cook.  I can vividly remember so many of the fabulous things she used to make:  lasagna, homemade applesauce, a poke cake that she made with Vess Whistle Orange soda, appetizers made from wontons baked in a muffin tin and filled with a yummy sausage and cheese mixture, and of course the famous brisket.  But one thing I really don't remember is her pork roast.  My dad loved it and talks of it fondly.  And I love my dad and talk of him fondly, so I've always wanted to make it for him, but the memories of it (for me) are so vague.  He can describe his memories of it to me, but in the past that still wasn't enough for me to make anything I was terribly pleased with.  Oddly enough, the thing I remember best is the pot she cooked it in.  It was oblong and covered, like a Dutch oven, but it wasn't made of cast iron.  It was a shiny-ish metal, kind of with the look of aluminum, and it looked like it had lived a bit of a hard life and gotten a little beat up.  Admittedly, that is very little to go on.  So I said, well, hell, I'm just going to make something that my dad will love, even if it's nothing like the ones of his past.  Yes, I'm 38 years old and my life still mostly revolves around pleasing my parents.  That and trying to raise my children to not be assholes.


As I often do, I consulted my America's Test Kitchen cookbooks for ideas.  Then I took a leap of faith and winged it for Christmas dinner, which I was serving to 12 people.  My gamble paid off.  So, maybe someday my pork roast will become a great food memory for my kids.  Things like that always keep me coming back to the kitchen.


Apple Cider Braised Pork Roast with Onions

With 6 pounds of meat, obviously this makes a lot as written.  I used my 8 quart Instant Pot.  You could certainly do just one roast in a 6 quart pressure cooker, but since I have not personally done it that way, I would suggest you still stick with the same amount of cider and water to make sure there is plenty of liquid to braise it and make it really tender.  It would be a lot of gravy for that amount of meat, but the words "too much gravy" really don't make sense to me anyway.  Kind of like "too much cheese."  I mean, that's just silly.  I honestly think the best way to make this is overnight.  That's how I did it on my first try.  Put all the liquid in cold, turn on the pot and off to bed with you.  When you wake up in the morning, it will still be warm but the pressure will be long gone, so just remove the lid and carry on with the step where you stick everything in the fridge.  Then reheat at dinner time.  Easy peasy.

2 (3 lb.) boneless, rolled Boston pork roasts
4 cloves garlic, minced
2 tsp. ground black pepper
2 tsp. salt
1 tsp. dried sage
2 large red onions, sliced pole to pole into 1/2" wedges
1 cup apple cider
1 cup water
1/2 cup apple jelly
1 Tbs. apple cider vinegar

Remove the netting from the roasts and discard.  Tie pieces of kitchen twine around the roast to hold it together.  (See pictures below.)  In a small bowl, mix together the garlic, pepper, salt, and sage.  Pat the roasts dry with paper towels and rub them all over with the garlic mixture.  Dump some of the onions into the pressure cooker pot, place the 2 roasts in and then add in the remaining onions.  Pour in the apple cider and water.  Lock the lid in place and cook on high pressure for 180 minutes.  (That's 3 hours for those of you who hate math.)  Allow a natural pressure release for at least 45 minutes, but several hours is fine.

Carefully remove the meat, as it may be falling apart, and put in a container or bowl and cover.  Pour the liquid (with the onions) into a separate container and cover.  Chill both for several hours.  About an hour before serving, preheat your oven to 250 degrees.   Scoop out any congealed fat from the liquid, and pour the liquid into a saucepan.  Dispose of the fat into your trashcan or your dog's stomach as you see fit.  Add the jelly to the liquid and bring it to a boil, then reduce the heat to a simmer.  Meanwhile, cut the twine off of the roasts and slice into approximately 1/2" pieces.  Arrange the slices in a glass baking dish, ladle in a bit of the cooking liquid/onions, and cover tightly with foil.  Heat the pork in the oven until the liquid that you're simmering in the saucepan has cooked down to a consistency you are happy with.  I simmered it for about 45 minutes, which reduced it by almost half.  The pork in the baking dish was plenty hot by then.  Once you take the onion gravy off the heat, stir in the cider vinegar.  Serve the onion gravy in a bowl separate from the sliced pork roast so everyone can add as much as they like.  It's great over potatoes, too.

This is what the roast will probably look like when you buy it from the store.  You want to remove this netting because it has something akin to elastic in it.  You want it tied with just plain old kitchen twine.

This is what it should look like after you tie it and rub it with the garlic mixture.

Nov 29, 2017

Cultural Appropriation: It's What's For Dinner


A few years ago, I asked for an Ancestry.com membership for Christmas.  It didn't take too long before I realized that it wasn't very smart for me to ask for such a thing at that point in my life, when I had a very young child who never slept or sat still, but for a few months I did my best to enjoy it in what little free time I had.  I hope to pick up where I left off with it some day, but in the minimal research I was able to do then, I definitely learned something about myself.  I am white, y'all.  I'm the whitest white girl on the planet.  I'm whiter than rice on a paper plate.  At least that appeared to be the implication from what I've found so far.  I ordered Ancestry DNA kits for my dad and I a few days ago, and I'm really hopeful there will be some kind of bombshell surprise ethnicity in there, but that's probably unlikely, given what recent immigrants most of my ancestors are.  I will admit to being a little disappointed at being so monochromatic.  While I'm definitely proud of the people I descend from, all white is just kind of boring.

So who is this white girl to teach anyone to make Indian food?  Who is she to make Indian butter chicken and serve it over basmati pilaf with naan?  Who does she think she is stocking her pantry with garam masala and turmeric?  What an elitist bitch.

Ok, I'll make you a compromise.  I'll let someone who actually knows Indian food school you on the butter chicken, because hers is amazing and needs no improvement (https://twosleevers.com/now-later-butter-chicken-pressure-cooker/), and I'll handle the basmati.  Ask your friend, Trader Joe, to make the naan for you.  Some day, when I'm feeling like usurping someone's culture again, I'll teach you how to make pressure cooker chicken tikka masala to go with your basmati.  Mmmm....diversity is delicious.


Pressure Cooker Basmati Pilaf

I like my rice to have some chew, so this is not super soft when it's cooked.  I think you'd probably need to add a bit more water and maybe 1 more minute of cook time to get a softer texture.  But that is a guess on my part.

4 tsp. coconut oil
3 whole cloves
1 stick of cinnamon
1/2 tsp. ground cardamom
1/4 tsp. ground cumin
1/4 of a large onion, thinly sliced
1 1/2 cups basmati rice
1 1/2 cups water
1 tsp. salt

Turn the pressure cooker to saute mode and add the coconut oil.  Once the oil is melted and hot, add the cloves and cinnamon stick.  Cook for about 2 minutes, until the spices are sizzling.  Add the cardamom and cumin and cook another minute or so.  Add the onion and cook until it is softened, another 2 or 3 minutes.  Stir in the basmati and cook for 2 or 3 more minutes in the hot oil, stirring frequently.  Add the water and salt and give it a good stir.  Lock on the lid and turn the pot to manual on high pressure and set for 4 minutes.  Once the cook time is over, do a quick pressure release.  Serve immediately and try not to bite into those whole cloves. :)

Nov 17, 2017

Winter Is Coming. No, really. It is.


When I say winter is coming, it's not a Game of Thrones reference.  I've never even seen that show because I suspect it has way too much gratuitous blood and boobs to interest me.  No, I mean winter really is just around the corner.  Are you prepared?  Are you stocked up on freeze-proof washer fluid and pet safe sidewalk salt?  Do you have Pinterest-worthy crafts on hand for the inevitable cabin fever that will overcome the kids when school gets called off for half an inch of snow for 3 days in a row?  Have you pulled all the tank tops and maxi dresses out of your closet, to be replaced by sweaters and wellies for sloshing around in half melted snow?  Ugh.  What a wretched, soul-sucking season.  Thank goodness for warm bowls of homemade soup.


But perhaps you never learned to make homemade soup.  Perhaps it all just seemed like too much work, what with the long simmering and occasional stirring and all.  Well, have I got great news for you!  Turns out your pressure cooker makes throwing together a pot of hearty, steaming hot broccoli cheese soup so easy, it's even less work than driving your ass to Panera to go through the drive-thru.  Especially those of you who, like me, have young children that you'd have to bring with you if you left the house in search of soup.  I mean, think about it.  Do you want to remind everyone to go potty and/or change diapers, ask them 800 times to please, for the love of all that is holy, just pick a flippin' pair of socks and shoes already and put them on, get screamed at when you turn off Bubble Guppies before the episode is over, and then finally wrestle everyone into their carseats?  Or do you want to cut up an onion and a few crowns of broccoli and then run your pressure cooker for 8 minutes?  Because that would literally be the choice I would be facing.


When I first started imagining how this soup would come together, it seemed pretty straightforward in my head.  I read a few recipes online to get some ideas and do you know one version called for 2 cups of half and half and 1 measly cup of broccoli?  No kidding.  I submit to that person that their recipe ought to be called cream of half and half soup with broccoli garnish.  But I digress.   I imagined my version to be thickened with a flour and butter roux.  But then I remembered all of the warnings I've read about how you never EVER thicken anything you make in the pressure cooker until after it's been cooked.  I'm not sure what happens if you thicken first, but, given the dire warnings I've seen, it apparently involves some sort of opening of the gates of hell from which chaos and evil rain down upon your children and your children's children.  Or maybe the pot never comes to pressure; I don't know.  At any rate, the advice was duly noted, and that's why I went for a non-traditional cornstarch thickener at the end.  I briefly considered still making a roux in a separate skillet like I do for my potato soup, but this was super easy and gave the desired endpoint with very little fuss.  "Very little fuss" is the key phrase for this recipe in general.  Just the way Instant Potheads like it.      

There now.  We're all one step closer to being ready for winter.


Pressure Cooker Broccoli Cheese Soup

I used my 6 qt Instant Pot and this made a nice quantity for 4 people.  I used fresh broccoli, but I'm guessing frozen would work out fine with possibly a small sacrifice in flavor.  I also used homemade stock because I had homemade veggie stock in the freezer that I had made in the Instant Pot previously, but you can certainly use canned broth.  Thanks to my friend Sue, I've recently become a fan of Better than Bouillon instead of canned broth.  That would be a good choice, too.  Chicken broth is fine if you don't need your soup to be vegetarian.  For the milk, I used evaporated because I like that it doesn't break when you stir it into the hot soup.  You can use 2% or whole milk instead if you want, but you always run a little risk of it looking curdled.

2 Tbs. butter
1 small onion, diced
1/2 tsp. salt
2 cloves garlic, minced
1 1/2 to 2 lbs. broccoli, cut into large florets and stems cut into 1/2" slices
2 cups vegetable or chicken stock
2 cups water
8 oz. mild cheddar cheese, grated  (I prefer to buy a block and grate it myself for better melting)
8 oz. cream cheese, cubed  (that's 1 whole block)
1/2 cup evaporated milk
2 tsp. cornstarch

Turn the pot to saute and add the butter.  When the butter is melted, add the onion and the 1/2 tsp. salt and cook until softened, about 5 minutes.  Add the garlic and cook until fragrant, about 1 minute.  Add the broccoli, stock, and water.  Put the lid on the pot and cook on manual for 8 minutes.  Do a quick pressure release and then turn the pot back to saute.  Stir in the cheeses a little at a time. Keep stirring until they are completely melted.  Whisk together the cornstarch and milk until smooth.  Slowly stir in the milk mixture and continue stirring until the soup thickens.  Season with salt and pepper to taste and serve.

Nov 2, 2017

If a Lasagna Falls Into a Pressure Cooker and No One is There to Put it in Layers, is it Still a Lasagna?


You would never know it if you walked into my house now, but I like things to be very neat and tidy.  I hate clutter.  And messes.  I like everything in its place, and I love organization.  Then I became a mother to 2 young children who hate to sleep.  Now my house, and my person, perpetually look as though they have just been ransacked.  I'm too tired to try to tame the shitstorm that develops every day, so I just try to ride it out and make sure my kids are still alive at the end of the day.  I've had to reach a place where I can at least tolerate, if not appreciate, a little chaos and messiness.


This is even evident in my cooking.  Back in the days of entertaining friends as a young, childless wife, if I had been asked to make a lasagna, I would've made a long simmered Bolognese sauce and lovingly layered it with a béchamel sauce and perfectly par-cooked lasagna noodles.  It would've been a thing of beauty.  But a lot of things in my life are a lot less beautiful now.  (Not my kids though; they're flipping adorable.)  So have I come to tolerate enough chaos and clutter that I can abide by a pile of lasagna components in a big sloppy mess on my plate?  Heck yeah, I can.  Well rested people can boil lasagna noodles and patiently layer them into a masterpiece while sipping a fine Chianti.  The rest of us can break uncooked noodles into pieces and chuck them into a pressure cooker while we refill a plastic cup of boxed wine from Target.  When your life is messy, I think it's totally cool if your food is, too.


Deconstructed Pressure Cooker Lasagna

I used my 8 quart Instant Pot and made a lot of this because I was feeding 4 adults plus wanting leftovers for lunches.  So this makes a lot, as written.  To use a 6 quart cooker, cut the ingredients in half (including the water) but keep the cooking time the same.  If you use Italian sausage, expect that you may need to drain the grease after you cook the meat.  That can be slightly annoying, so if that step bothers you, just use a very lean ground beef and you shouldn't need to drain it, but the flavor is obviously a bit more interesting with the sausage in there.  FYI, I think this would be great with a bunch of curly leaf spinach thrown in after cooking and wilted down briefly.  Definitely going to try that next time.

1 Tbs. oil
1 medium onion, diced
1 yellow and 1 red bell pepper, chopped
4 cloves garlic
1 lb. lean ground beef  (or 2 lbs. if you're not using Italian sausage)
1 lb. Italian sausage  (optional)
28 oz. diced tomatoes seasoned with basil, oregano, and garlic (do not drain)
24 oz. jar of spaghetti sauce of your choosing
4 cups water
1/2 tsp. salt
1 lb. lasagna noodles, uncooked and broken into approx. 1" to 2" pieces
1 cup freshly grated Parmesan cheese
2 cups shredded mozzarella cheese
1 cup ricotta cheese

Turn the pressure cooker on saute mode and add the oil.  Once the oil is very hot, add the onion and bell peppers and cook about 5 minutes until the onions are softened.  Add the garlic and cook until fragrant, about 1 minute.  Add the meat and cook until no longer pink.  Drain away the grease, if needed.  Add in the diced tomatoes and their juice, spaghetti sauce, water, salt, and uncooked lasagna noodles.  Give it a good stir so that all the noodles aren't sitting in a big pile on top of each other or they may stick together.  I like to try to get them as submerged in the liquid as possible.  Lock on the lid and change from saute mode to manual and cook on high pressure for 4 minutes, then do a quick pressure release.

Stir in the Parmesan and mozzarella cheese until well distributed and melted.  Add salt to taste, dollop spoonfuls of the ricotta on top, and serve.


Oct 25, 2017

Meat and Potatoes: Their Greatest Hits, Disc 1


I haven't mentioned my Grandma, Marguerite, much on this blog yet, but she was the central inspiration for my other blog, Vintage Kitchen Recipes.  She was a wonderful person, and an exceptional cook.  She and my Grandpa, Otto, were a great team in the kitchen, and I think they loved nothing more than feeding us and my uncle's family a big meal on Sundays.  Almost every weekend, and certainly every holiday, we were there, and they were feeding us.  Playing with my cousins at their house and then everyone sitting around the dining room table enjoying whatever delicious meal they had created are my very best childhood memories.  Boy, do I miss those 2 people.  (Sniff.)


There are many foods I associate with my Grandma.  She made a fantastic lasagna, which I'm sure incorporated her amazing homemade Italian tomato sauce.  (See my other blog for a recipe for the sauce!)  My dad still dreams of her pork roast, and I haven't been able to successfully replicate that one yet, despite some valiant efforts.  There was a cake she often made for our birthdays that was like a Boston Cream Pie that was amazing, and I could go on and on.  But if there was a gathering where friends or my mom's side of the family would be there and they knew Marguerite was coming, the one thing they were all going to request was BRISKET.  She was truly the brisket queen.  Once she was gone, (and she was mentally gone even before she was gone physically) I took up the brisket banner and carried it on in her place.  She wrote the recipe out for me by hand (what a treasure that is), and I've made it often, relishing a chance to read her handwriting and relive such wonderful memories.  Mine tastes just like hers, so it makes me feel like a bit of her lives on through my coking.  The brisket queen is dead; long live the brisket queen.


And then came my Instant Pot.  And it dawned on me that that sucker was MADE for brisket.  A tough cut that needs a ton of cooking to be enjoyable?  Not anymore, sucker.  Move over, oven.  Get lost, roasting pan.  This was, in fact, the day that I fell in love with my Instant Pot.  I had no idea what I was making for dinner.  It was already after noon when I found myself digging through the freezer, looking for inspiration.  I found the chunk of brisket and thought, what the hell.  I'll take a stab at converting Grandma's recipe, which is a multi day ordeal, what with the marinading, cooking, cooling, slicing, rewarming, etc.  Turns out I did it in 90 minutes total, and it was every bit as good as hers.  I was almost as impressed with myself as I was with the pot.


Like a lot of things I make, this is very versatile.  You can put it on a crusty roll to make sandwiches out of it.  You could opt for shredding the meat more as opposed to slicing and eat it over egg noodles or mashed potatoes.  My Grandma's original recipe had mushrooms, but we've been over how those make me want to vomit, so naturally I omit them.  But, hey, if they don't make you want to vomit, you could toss some of those in there.  You could roast some baby potatoes and carrots and eat it almost like a pot roast.  The sauce is more thin like a jus than it is thick like a gravy, but it would still work.  Go nuts.  Make extra if you want; it's fabulous left over.  Speaking of that gravy...good golly.  I'm not sure I can even think of a superlative that is appropriate.  I could just drink it with a straw.


I'm a huge fan of the traditional meat and potatoes pairing.  Tonight when I made the brisket, I took the opportunity to use an America's Test Kitchen recipe for smashed potatoes as a basis for a pressure cooker version of smashed potatoes.  Super easy, super delicious, and perfect with the brisket.  Hopefully they don't sue my ass for posting it.


Since I got mine, I've often wondered what my Grandma would've made of this electric pressure cooker trend.  She wasn't much into new fangled things.  One year my dad got her a cordless phone as a gift so that she could take the phone out with her when she worked in the yard.  It was back in the days of having to pull out the antenna when you answered.  The image of her attempting to use it with the antenna pointing down as she yelled into the earpiece (and the laughter that ensued from the rest of us) will forever be burned into my brain.  So I have a feeling all the buttons and the beeping and such would've been a bit much for her.  But I have no doubt she would be super proud of the meals I've churned out of mine.  But then again, she was proud of everything I did.  One year, as I tried fruitlessly to think of a good idea of something to give her for Christmas, my mom said, "You could wrap a turd in foil and she'd say, 'well, you made it yourself!'"


Pressure Cooker Brisket with Onion Gravy

I used my 6 quart Instant Pot.  This makes a lot of gravy, so you could do a bigger chunk of meat if you want, but cut it into several pieces to keep the cooking time the same.  Either that or bump your cooking time up.  The 2 1/2 lb. brisket will easily feed 4 to 6 people.  This is really good leftover, too.  

2 1/2 lb. (give or take) brisket, cut in half
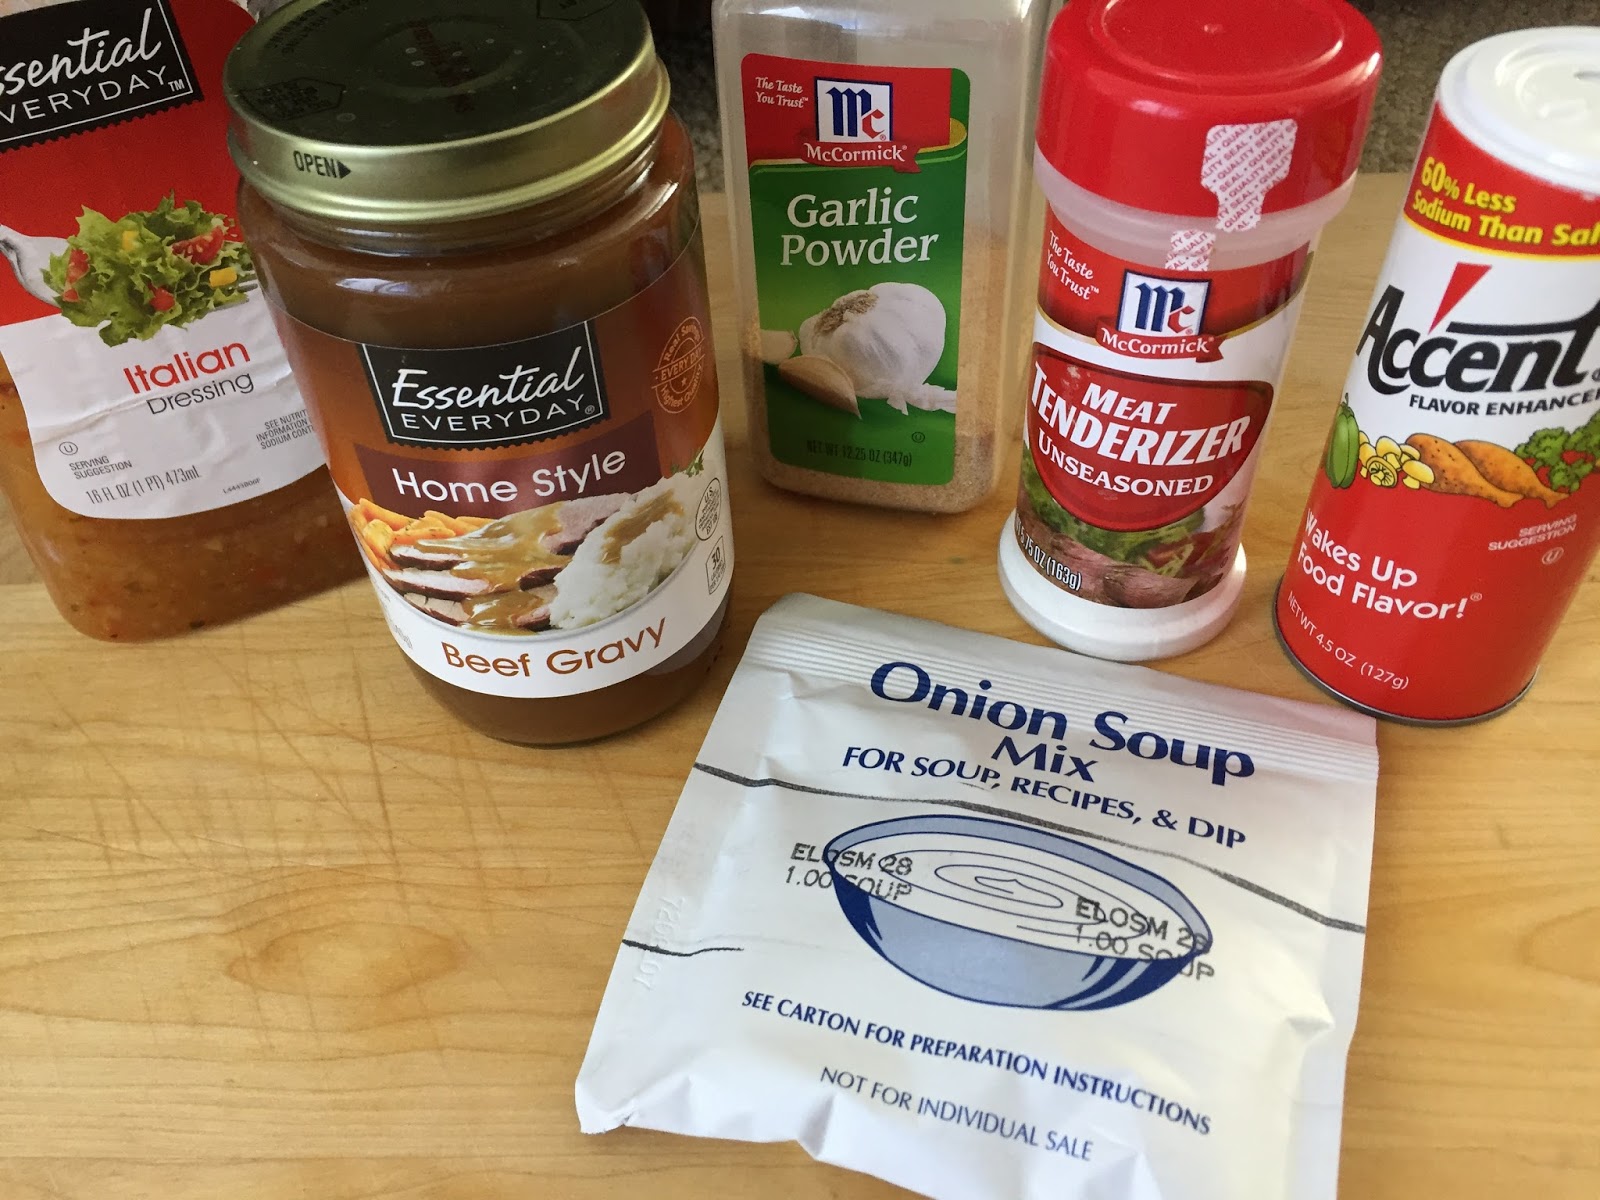
Accent flavor enhancer
Meat tenderizer powder
Granulated garlic
2 tsp. oil
1/2 large onion, sliced
2 cloves minced garlic
1/2 cup beef broth
1 can beef gravy
1 pkg. dry onion soup mix
1/2 cup Italian dressing

Sprinkle the brisket all over with Accent, meat tenderizer, and garlic.  No need to measure; just sprinkle liberally.  Mix the canned gravy, onion soup mix, and dressing together; set aside.

Heat the oil in the pressure cooker on saute mode.  Once the oil is hot, add the onions and cook until browned and some fond is on the bottom of the pot, about 5 to 8 minutes.  Add the garlic and cook until fragrant, about a minute.  Pour in the broth and scrape up the fond from the bottom of the pot with a wooden spoon.  Add the brisket pieces to the pot and pour in the gravy mixture.  Put the lid on and turn the pot on to manual set for 75 minutes.  After the cooking time is over, allow a 10 minute natural pressure release, and then remove the brisket from the gravy.  Let the brisket rest for a few minutes before slicing.  Return to the gravy and serve.  The meat may shred apart as opposed to making nice slices unless you let it sit and cool for a while.  Or, if you really want nice, neat slices, I suggest you cook it a day before you need it and refrigerate it overnight.  Then, to reheat it, just put the gravy and the sliced meat in a sauce pan and heat it on the stove top.

Pressure Cooker Smashed Potatoes

I used my 6 quart Instant Pot.  I just want to say again in hopes that they don't take me to court for posting this, I based this recipe very closely on an America's Test Kitchen recipe.  I'm not going to do what a certain popular food blogger does and just barely tweak a recipe and then pass it off as if it's mine.  I won't name names. :)

2 1/2 to 3 lbs. small red potatoes, washed but not peeled, and make sure you cut out any bad spots
1 cup water
1 bay leaf
1 tsp. salt
1 stick of butter
1 (8 oz.) pkg. cream cheese, well softened
3 Tbs. fresh chives, chopped

Turn the pressure cooker on to saute mode and add the stick of butter.  Melt the butter completely and then pour it into a large serving bowl.  You can rinse out the pressure cooker pot if you want, or don't.  Whatevs.  Add the water, bay leaf, and salt to the pot.  Insert the trivet and pile all of the potatoes on top.  Lock on the lid and set to manual for 12 minutes.  While the potatoes are cooking, add the cream cheese to the serving bowl with the melted butter and do your best to whisk it together.  It may look a little curdled or separated, and that's ok.  When the cooking time is up, do a quick pressure release.

Remove the potatoes and trivet from the pressure cooker.  Scoop out 1/4 cup of the hot water from the bottom of the pressure cooker pot and add it to the butter and cream cheese mixture in the serving bowl (make sure you don't grab the bay leaf in your scoop o' water).  Whisk again until the mixture is about the consistency of runny sour cream.  Whisk in the chives.  Add the hot potatoes to the serving bowl with the cream cheese mixture and smash each potato with a stiff wooden spoon.  Smash as much or as little as you want.  I like to leave some really big chunks of potato intact.  Add pepper and adjust the salt to taste.  Stir until well combined.


Oct 22, 2017

15 is My Limit on Schnitzengruben


I'm guessing every family has those people who are known for certain dishes.  The ones that make the best, most delicious version of "whatever" that it's just a given that no one else but them makes it in the event of a family gathering.  In my family, my Aunt Linda makes the best apple pie.  (Check out my other blog to learn her method: http://vintagekitchenrecipes.blogspot.com/ )  My Aunt Kathy makes amazing fruit salad.  My Grandma Marguerite, among other things, was the brisket queen.  And I?  I make the German potato salad.  I am the potato salad Jedi, and you are my padawans.  Let's begin.  First, don your finest tutu.


Ok, that part is optional.  But it is my daughter's preferred method.

I love German food.  Sausages, schnitzel, potatoes, pretzels, beer.....lots and lots of beer.  Then more pretzels.  One of the joys of my husband's active duty Army years was that you were never too far from good German food.  Near an Army base you can always find it.  But I was never going to get potato salad at a German restaurant because that was something I could make an excellent version of on my own.  I'd leave it to them to cook me the things I didn't know how to make.  So, is my recipe authentic?  Beats me.  I mean, it's got Miracle Whip in it, so probably not.  But it's tasty, and it's by far one of my most requested dishes when I'm being asked to bring something to share to a big gathering.  


When I first got my Instant Pot and saw that people were cooking the potatoes for potato salad in their pressure cooker, I immediately knew I wanted to convert my own recipe, and it did not disappoint!  If the only thing I ever used my IP for as long as I owned it was to make this recipe, it would still be worth it just to avoid peeling and cutting up a bunch of burning hot potatoes.  Now you can peel and cut ahead of time, cook your hard boiled eggs right along with potatoes, and then continue on by cooking the dressing right in the pot using the saute mode.  Sehr gut, ja?


Pressure Cooker German Potato Salad

I used my 6 quart Instant Pot and an Oxo Steamer basket.  I prefer red potatoes for this recipe, but I like Yukon Golds pretty well also.  No russets.  I don't feel like they hold up to the cooking well enough. If you like really eggy potato salad, throw in a third egg.  Start with 1/2 cup of sugar and you can add more during the taste test at the end, if needed.

1 cup water
2 1/2 to 3 lbs. potatoes, peeled and cut into cubes around 1/4" to 1/2"
2 or 3 eggs
half of a medium yellow onion, diced
1/2 to 3/4 cup sugar
salt and pepper to taste
12 oz. package bacon, diced
1/2 cup white vinegar
2 Tbs. Miracle Whip

Pour the water into the pressure cooker.  Insert a steamer basket into the pot and add the potatoes.  Place the eggs on top of the potatoes and put the lid on the pot.  Cook on manual for 4 minutes and then do a quick pressure release.  Remove the eggs.  I like to immediately crack them when they come out and then put them in an ice water bath.  This both stops the cooking process and makes them easier to peel.  Peel and chop the eggs.  Remove the steamer basket from the pot and put the potatoes into a large serving bowl.  Add the eggs, onion, sugar, salt, and pepper to the potatoes and stir gently, making sure not to mash up the potatoes too much.

Dump out the remaining water from the pressure cooker pot and turn on saute mode.  Add the diced bacon and cook until the bacon is crispy.  Do not drain the grease.  With saute mode still on, add the vinegar and Miracle Whip to the bacon and grease.  Stir until it is well combined and bubbly.  Pour the hot bacon mixture over the potatoes and stir until the potatoes are all well coated with the dressing.  Give it a taste and adjust your sugar, salt, and pepper accordingly.  Serve warm or room temperature.


Oct 21, 2017

I Love Things that Start with the Word "Lazy"


Recently there was a really great sale on the Instant Pot on Amazon, and I personally had a part in talking somewhere around 7 people into buying one.  A couple of us who use ours a lot teamed up to deliver an irrefutable list of talking points on why they are so indispensable to the modern home cook.  I'm starting to feel like the big wigs at the Instant Pot company owe us some manner of commission or stock option, because let me tell you, we can take the most hesitant potential consumer, wow her with promises of quick meals and homemade stock, and have that girl guzzling the figurative pressure cooker Kool-Aid within several days of getting her pot out of the box.  Welcome to the cult, bitches.


So, here's the thing:  I'm lazy about a great many things, but almost never is one of those things cooking.  Cooking is my greatest passion and joy.  It's where I love to put my energy.  My laziness comes across in other places like, say, my appearance.  Putting on makeup?  Styling my hair?  That sounds like a lot of effort.  But even I need quick meals that require a minimal amount of effort.  I just still want them to taste homemade.  Recently I had plans to make Mark Bittman's excellent Vegetables au Vin with Coq from his Food Matters Cookbook.  I had yet to start paring up the green beans or anything when all of a sudden it was 4:45.  I was home alone with 2 kids, one of which says, "mommy, watch this!" every time she even sticks her tongue out, and one of which is 1 year old and is the biggest shit disturber on the planet.  I was NOT getting that meal made and I knew it.  So now it's approaching 5:00 and I had no idea what I was going to make for dinner.  So I took the chicken that I had thawed to be the coq in my coq au vin and just threw it in the pressure cooker with some broth, BBQ rub, and sauce.  I got out my second Instant Pot and made pressure cooker macaroni and cheese (which is so amazingly good and easy it's *criminal,* you guys), added a veggie, and voila!  Dinner was made.  But the key is, it didn't taste like something prepackaged and full of mystery ingredients.  It didn't taste like a frozen bag of something that was cooked in the microwave.  It tasted like something I made.  Because it was!  Just because you need your meal to be ready fast doesn't mean it can't be great.  And, sometimes I need to remind myself, just because you love to cook, doesn't mean you have to invest a ton of effort to end up with something tasty.  We can all be lazy once in a while.

Lazy (Wo)Man's BBQ Pulled Chicken

Use a store bought BBQ rub if you want to be truly lazy.  I used my 6 quart Instant Pot and have doubled this recipe with great success.  If you want to double, keep the cooking time the same but double everything else.  I've used combinations of dark and white meat and just used the same cooking time for all of them and they've come out great.  I don't think there's any need to be too finicky with the cooking time because there's plenty of liquid to keep things from drying out.  If you're using breasts and they're huge (heh heh, huge breasts...) cut them into 2 or 3 smaller pieces.

1/2 cup chicken broth
1 1/2 lbs. boneless, skinless chicken breasts, thighs, or tenderloins
1 Tbs. BBQ dry rub--my recipe follows, if you're not feeling *too* lazy
1/4 to 1/2 cup BBQ sauce

PAY ATTENTION CLASS, this is difficult.  Pour the broth into the pressure cooker.  Add the chicken and sprinkle on the BBQ rub.  Pour in the BBQ sauce.  Put the lid on and set to manual for 10 minutes, then allow a natural pressure release for 10 minutes.  Remove the chicken and turn the pot to sauté to reduce the sauce a bit.  Shred the chicken while the sauce is simmering and add it back once the sauce is at the consistency you like.  Listen to your children complain that they don't like BBQ sauce.  Try not to be too mean when you tell them you guess they're just going to be hungry, then eat their portion with gusto because it's so damn good.  It's like I've got a flippin' crystal ball, right?

All Purpose BBQ Dry Rub

This recipe makes way more than you need for just the BBQ chicken, but it keeps almost forever and is good on any kind of meat, so I like to make a lot and just keep it in an airtight container.  This is a great time to use good quality spices, when you're *really* going to taste them.  I love Penzey's spices.  Their Mexican oregano, smoked paprika, and chili powder are all dynamite.  And if you happen to have smoked salt, YES.

2 Tbs. smoked paprika
2 Tbs. sweet paprika
2 Tbs. chili powder
2 Tbs. cumin
3 Tbs. dark brown sugar
2 Tbs. salt
1 Tbs. oregano
1 Tbs. freshly ground black pepper
1 tsp. cayenne pepper


Sep 23, 2017

Well Kids, When a Banh Mi and a French Dip Sandwich Love Each Other Very Much....


Do you ever wonder where people get their ideas for new recipes?  I do.  Like those recipe videos your friends are always sharing on Facebook--I saw one once where they made monkey bread out of canned cinnamon rolls.  The one my mom made when I was growing up used canned biscuits.  But instead, this video showed the obligatory mysterious pair of hands doing the slow motion pull-apart of gooey cinnamon roll bites, icing dripping down the sides.  Why didn't I think of that???  Why haven't I done it yet???  Why am I not doing it RIGHT NOW????  I didn't think of it because creativity is not my thing.  The only way I'm going to get a good idea is to steal it from someone else.  Which brings me to this sandwich.


My family just came back from a trip to Hawaii.  Most of my vacations result in at least one amazing food memory; the one that sticks out in my mind above all others.  The authentic boeuf bourguignon I had in France the first time I went there, for example, or the picnic lunch of fresh baguette and cider that my husband accidentally sprayed all over me when I went back years later, the amazing fried chicken with a drizzle of honey from the Bryce Canyon Lodge, the freshly caught and prepared shrimp I had on the beach in Honduras after an ocean kayaking trip......the list goes on and on.  I'm fortunate to have seen, and eaten in, some amazing places.  This trip we cooked at our rental home for almost every meal because, in case you've been living under a rock and don't know it, Hawaii is really damned expensive.  The days were dwindling down and, despite how super cool it was to watch my brother and husband hack open a fresh coconut right out of the backyard while my daughter squealed with delight, no food memory in regards to an actual meal had yet been made.  Luckily, at what was quite literally the final hour of our trip, before heading to the airport, I had a sandwich so good, I resolved to go home and recreate it.  I've been home less than a week and I already gave it a whirl.  I guess you could say it made an impression.  I will give credit where it is due, to the amazing chef at Uncle Bo's in Haleiwa, Hawaii on the north shore of Oahu.  I believe he called his version the Mekong Dip.  It was so amazingly good.  It seemed to have a bit of a Vietnamese flair to it (although our server told me the chef is from Laos, so it's probably more likely that I don't understand the subtle differences between Vietnamese and Laotian food).  My version ended up tasting more Thai-ish, which is unsurprising to me, given that I am a fanatic for Thai food.  The overall concept, however, is still the one I stole from Uncle Bo, which can be stated as the following:  what if a banh mi did it with a french dip, and they had little bastard sandwich babies?


I was totally winging it, and I have to say, I'm pretty proud of my first effort.  The "dip" part of mine tastes a lot like tom kha gai soup, in my opinion.  I'm sure mine is never going to be as good as Uncle Bo's, so I'ma name mine the Tom Kha Gai Dip.  If you want to get tipsy, pair it with an Incline Cider Company Lemongrass Cider, or a Kona Brewing Company Lemongrass Luau.  Yay for stealing other people's creativity!  Now, if you'll excuse me, I have to go buy 4 cans of cinnamon rolls.

Pressure Cooker Tom Kha Gai Dip

2 lbs. boneless, skinless chicken thighs
2 cans unsweetened coconut milk, divided
2 Tbs. prepared red curry paste
2 tsp. brown sugar
2 kaffir lime leaves, dried
a generous handful of fresh cilantro--leave the stems attached so it's easier to fish out after cooking
1 Tbs. fish sauce
1 lime, juiced
salt to taste (I used a little less than 1/2 tsp.)

4 crusty rolls

Possible Garnishes

sliced fresh tomato, cucumber, yellow or white onion, jalapeno, red bell pepper
fresh bean sprouts
fresh cilantro or basil

Whisk together one can of the coconut milk with the curry paste and brown sugar.  Add the chicken to the pressure cooker, along with the cilantro and lime leaves.  Pour in the coconut milk / curry paste mixture.  Put the lid on the cooker and set to manual for 10 minutes.  Allow a natural pressure release for 10 minutes and then release any remaining pressure and open the pot.  Use tongs to remove the chicken and set it aside.  Remove the cilantro and kaffir lime leaves and discard them.  Turn the pot to saute and whisk in the remaining can of coconut milk and fish sauce.  You just need the sauce to get hot again after adding the room temperature can of coconut milk; it won't take long.  While the sauce is reheating, shred the chicken.  After the sauce is hot, remove it from the heat and stir in the lime juice and salt to taste.  Build the sandwiches using a good hard roll with a nice, crusty exterior that won't immediately fall apart when you dip it.  Pile on some chicken and your garnishes of choice.  Serve with a little bowl of the coconut curry sauce, dip, and nosh.

Aug 28, 2017

Make Tomorrow Taco (Soup) Tuesday!


I have a marvelous soup recipe for you.  What I don't have is sparkling wit and insightful commentary.  No funny stories.  No relatable anecdotes.  I got nothing.  I drank 2 martinis and more than a full bottle of wine on Saturday night and I swear my brain is still fried.  I went out to the front of the restaurant I was at when they closed at 1 am to wait for my cab, reached into my purse and pulled out the half-full bottle of wine that my friend and I still had on our table when they closed the place down.  I don't even remember putting it there, and I'm pretty sure I broke the law by carrying it out of there.  But you better believe we drank it from the bottle while we sat on the curb and waited for our ride, because we are classy bitches.  You can take the girl outta north St. Louis county.... 


So, yeah.  I think I'm still recovering from that outing.  I was still functional enough to make this recipe perfectly on the first try, but that must have used up the last of my operational brain cells.  Therefore, bon appetit.  Hopefully I'll recover some semblance of writing ability in the near future.

 
By the way, I just want you to know, it's hard to take a good picture of soup.  Granted, I don't really take very good pictures of anything, but soup is particularly hard.  My husband and I both absolutely devoured this, and the best picture I could take makes it look a bowl of barf.  So pardon how unattractive this looks.  I promise it is very tasty.


Pressure Cooker Taco Soup with Cilantro-Lime Sour Cream

Notes:  I used my 6 quart Instant Pot.  I call for fresh corn, but you could easily substitute canned or frozen corn.  I just love the crunch of the fresh stuff, and since it's still plentiful right now, I went for it.  I always fry (or sometimes bake) my own tortilla strips, but you could certainly use a bag of tortilla chips.  They don't hold up as well, but I understand what it's like to be busy. :)  Don't drain the cans of Rotel.  I used fire roasted, but choose any version you like.  Also, don't soak your beans.  Both the dried beans and the meat have a similar cooking time and will come out perfect together.

2 tsp. oil
half of a large onion, chopped
half of a large poblano pepper, diced
salt
2 cloves of garlic, minced
1 1/2 lbs. round steak, cut into small (~1/2") cubes
2 (10 oz.) cans diced tomatoes with green chilies, such as Rotel
1/2 lb. dried black beans
1/2 lb. dried pinto beans
4 cups water
1 pkg. taco seasoning
1 pkg. ranch dressing mix
1 (15 oz.) can cream style corn
2 ears of fresh corn on the cob, corn kernels cut off

1 cup sour cream
1 tsp. lime zest
2 Tbs. fresh cilantro
pinch of salt

Possible toppings:
shredded cheddar or monterey jack cheese
tortilla chips or fried tortilla strips
diced avocado
chopped green onion
fresh lime wedges

For the cilantro-lime sour cream, combine the sour cream, lime zest, cilantro, and pinch of salt in a food processor and process until cilantro is completely chopped and incorporated.  Refrigerate until ready to use.

For the soup, turn the pressure cooker to saute mode and add the oil.  Once the oil is hot, add the onion, poblano pepper, and a pinch of salt.  Cook until the onions and peppers are softened.  Add the garlic and cook for a minute or so until fragrant.  Add the round steak, Rotel (with its juices), beans, water, taco seasoning, and dressing mix.  Cook on high pressure for 55 minutes.  Do a natural pressure release for 10 minutes, then finish with a quick release. 

Stir in the cream corn and fresh corn and heat through.  If you're adding frozen corn, you'll probably want to turn on saute mode to make sure it heats through.  If you're adding fresh or canned corn, the soup will probably already be hot enough to heat the corn without turning the pot back on.  Serve with the cilantro-lime sour cream and other desired toppings.